
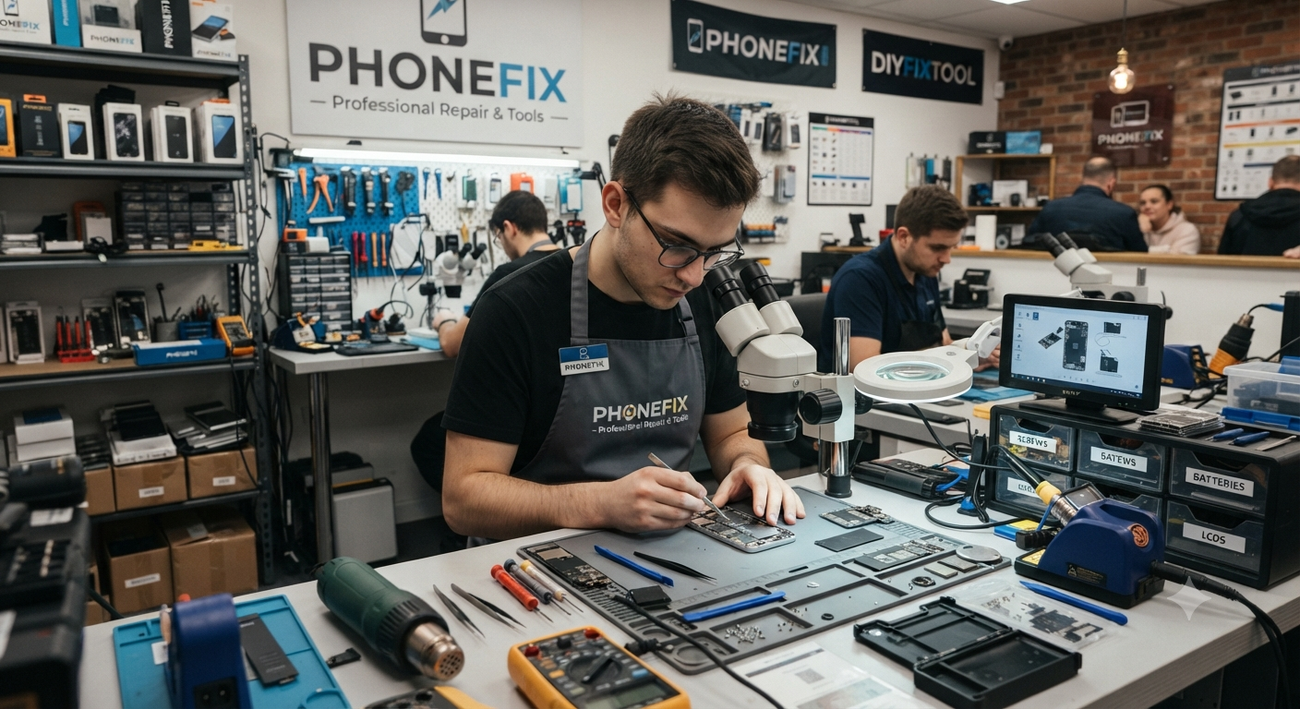
Damage or malfunction in an iPhone’s display can frustrate daily use. Some lines may appear across the screen, parts of the screen that seem unresponsive to touch or flicker, strange colors, or the entire screen may be black. It’s also important to determine whether the display is really the primary issue before ordering a new screen and undergoing an iPhone Screen Replacement.
A screen issue sometimes can be related to loose display connector, software problem, physical damage or another internal component. Several simple tests will enable you to find out what’s going on, and whether a screen replacement is necessary.
For someone who intends to repair or check the device on his/her own, it is also essential to have the correct Screen Repair Tools. Using the right tools can help make this process easier, and minimize the risk of damage to the phone when dismantling it.
Check the Screen for Visible Damage
First look: a simple visual examination. In your first step there is no special equipment needed.
Examine the whole display and check for:
- Cracks/broken glass
- Black spots
- A line that is either green, purple, or white
- Flickering areas
- Uneven brightness
- Discoloration
- Burn-in/persistent pictures
Inconsistencies in the display that look as though they are not working at all.
However, small cracks don’t always warrant the replacement of the entire display. If the touch has also malfunctioned, however, because of strong impact to the screen, the internal damage could have been inflicted on the display assembly.
Wipe down screen with a soft microfiber wipe before testing. Touch response can sometimes feel worse than it is, due to dirt, moisture, or fingerprints.
Test Touch Response Across the Whole Display
An easy way to test an iPhone display is to have a look at the responsiveness when touched in various parts of the screen.
Start an app that has a large screen. Alternatively, the keyboard can be opened up and keys can be pressed. Slide finger gently back and forth across the display.
Pay attention to areas where:
Tapping does not activate
Touch registers late
The screen selects something without being touched
Your finger no longer moves.Your finger suddenly does not move.
Part of the answer is no part of the answer.
The digitizer may have been damaged if only one small area is not responsive. If the majority of the touch detection is off, it’s possible that the display needs replacement.
It’s particularly helpful to test the whole display before purchasing a replacement screen for your iPhone, as the objective is to make certain you aren’t turning your hand over with a touch issue versus a display issue or one that has the ability to cover both problems.
Check for Dead Pixels and Display Problems
While a display may appear to be in good shape, specific pixels may malfunction.
Check this by opening images that have simple solid colour backgrounds of white, black, red, green or blue. Examine display carefully using regular room lighting.
You may notice:
- Tiny black dots
- Bright spots
- Pictures with no change in colour.
- Uneven areas
- Strange patches
Lines that can be seen on every screen.
If the display itself is damaged, there may be a few pixel defects that will not affect its function, but many dead pixels or noticeable fault will indicate this trouble.
It may also be helpful to run this test after replacing the display in an iPhone Screen Replacement.
Look for Flickering or Random Brightness Changes
Another crucial test is the screen while switching between light and dark material while utilizing different applications.
Displays should be solid and stable. If the screen flickers, turns darker than usual, flashes or changes brightness for no apparent reason, then there is a problem with the screen or connection.
Restart the iPhone to make sure it isn’t the screen, but if it persists then it is likely to be broken.
If the problem only occurs from time to time, record the time periods. For instance, does it occur as the telephone grows hot, while relocating or after pressing a specific portion of the frame?
These details could be used to determine if the issue is regarding the display or other parts of the smart phone.
Test the Screen After a Restart
Software issues can occasionally manifest themselves as hardware issues.
Turn on the iPhone and inspect its screen again. Note if the same issue is observed right after it turns on.
Web 2.0 page works fine when it is rebooted but weirds out after running a certain application, it may be a software related issue.
However, if the same lines, dead areas, or touch reading issues also happen when the device is being started up and when it is restarted, the chances of damage become higher.
It is an extremely simple thing to do, but can save you from needlessly replacing a screen.
Check Whether the Problem Changes With Movement
It is advisable to be very careful if the display issue commenced after a phone drop.
Without opening the phone, gently move it in your hand and observe the display. Avoid bending, squeezing or exerting high pressure on the phone.
Is the display off when the phone moves, flickering or changing? It could be a problem with a connection in the phone.
Don’t mix this up with having to replace the display. Sometimes similar symptoms occur when the connector and connection are damaged. Before deciding on repair, it is necessary to perform proper inspection.
Check the Display Connector During Repair
For an iPhone that can be opened, the display connection could be checked while the phone is being repaired. This is where the correct Screen Repair Tools are important.
The modern smartphone can be tricky to work on, and a simple screwdriver isn’t enough. The job will be difficult without the proper tools like small screws, clips, brackets, connectors, and glue.
Useful tools that are available on the iPhone model vary, but they might include:
- Precision screwdrivers
- Opening picks
- Plastic pry tools
- Suction tools
- Tweezers
- Spudgers
- Small brushes
- Cleaning tools
Equipment for heat application or and/or adhesive removal.
Always use tools that are suitable for electronics. It’s important to take care around sensitive components when handling the metal tools, otherwise you might cause more damage with an accidental slip.
Repairing and reassembling with a good matching set of Screen Repair Tools can be made much easier.
Do Not Rush Into an iPhone Screen Replacement
In the event there was a cracking found on the display screen, you will probably want to replace an iPhone screen, but it’s preferable to determine what the precise issue is.
Imagine that someone put a thick blanket over the iPhone, so as to block out all touch. Not opening the device to inspect the screen could be a time and cost sink if the server problem is actually on the actual different parts of the device.
When ordering a replacement, take into consideration:
Has the phone dropped or been hit somehow?
Has the glass been broken or cracking?
Does it look the same in the picture?
Are there some places in which touch work?
Is there a line or black spot?
Does restarting make a difference?
Has the problem occurred after exposure to water/moisture?
Does the display change its appearance when the phone is moved?
The answers may help you to have a better understanding of what to address.
Choose the Correct Replacement Screen
Once you have noticed that the display assembly is damaged, you will need to locate one that fits your needs.
Display is not a “universal part” of an iPhone. There are variations in the screen size, connector, technologies and assemblies used in the different iPhone models.
Make sure to pay attention meticulously to the exact iPhone model before making a purchase of an iPhone Screen Replacement.
These are likely to be composed of replacement screens standardized to a specific model, designed to match the original phone screen, and not just iPhone screen.
Depending on the device and repair needs, an OLED screen with the correct touch digitizer assembly may be one component to consider for DIY repairs.
Use the Right Screen Repair Tools
The type of tools you have can greatly influence repair operations.
If the screw head is not properly covered by the screw driver it can result damage to the screw head. A blunt pry tool may catch on the parts inside and scratch them. Excessive force can also lead to damage of clips, cables or display.
So, it’s helpful to have Screen Repair Tools ready before you start opening the phone.
Precision screwdrivers, opening tools, suction tools, tweezers and other small electronics repair equipment may be required based on the repair tool kits.
If everything is settled in front of you start then, you are least likely to leave the repair session in the middle because you lack some important tool.
Test the Replacement Display Before Final Assembly
Prior to fully enclosing the iPhone screen replacement, a crucial facet is testing out the display.
Check and connect replacement display as per repair mode for your model and ensure the main functions are working.
Check:
- Display brightness
- Touch response
- Colors
- Dead pixels
- Lines or flickering
- Front-facing camera functions
If there is a function for proximity, use it, otherwise don’t.
Other features impacted by the show assembly
Move your finger all over the screen; do not just test the middle.
If something aren’t working, it’s far easier to troubleshoot before putting the telephone back in full services.
Take Your Time With Adhesive and Reassembly
Once you’ve seen that the replacement display will function correctly you can proceed with the reassembly.
Take your time in this step. Ensure the cables are in the right place and that the screws are put back in the right place.
Screws may vary in size, so it’s a good practice to keep them organized when taking them apart. The problem with mixed screws is they can cause issues when reassembling the phone.
Clean and ensure that the replacement part fits properly when installing a new adhesive.
The intention isn’t just to boot up the mobile phone again. It should display well, should be able to be touched all over the board and should be put back together carefully.
When Should You Get Professional Help?
While it can be convenient for individuals with the appropriate tools and experience to follow DIY screen repair, it isn’t always suitable.
If you notice any of the following, give a professional repair shop a call:
The interior of the phone has extensive damage.
The display connector has been damaged.
The phone has been exposed to liquid
The device fails to turn on the screen.
Many functions have failed to function.
You’re not feeling comfortable with opening up the phone.You are not feeling comfortable opening the phone.
You don’t have proper Screen Repair Tools
The professional tech can then examine the phone and determine if the issue is solely on the display or with another part of the phone.
Final Thoughts
Before replacing the display, take your iPhone to work to test it out, to figure out what the actual issue is or to prevent an unnecessary repair. Perform basic tests like checking for any damage, a touch response test, checking for dead pixels, flickering, and restarting the phone.
If they find that your display is indeed broken, be certain to purchase the correct one, as it must be your exact model of iPhone. Use appropriate Screen Repair Tools when doing a repair yourself may also make the repair work safer and easier.
One thing which is fundamentally important is to test the new display before the complete assembly is done. Testing can take a few extra minutes, but that can help you find issues that might arise at the beginning before you make it through the iPhone Screen Replacement process.
IPhone screen replacement
Screen replacement tools
More iDevice Central Guides
- iOS 17 Jailbreak RELEASED! How to Jailbreak iOS 17 with PaleRa1n
- How to Jailbreak iOS 18.0 – iOS 18.2.1 / iOS 18.3 With Tweaks
- Download iRemovalRa1n Jailbreak (CheckRa1n for Windows)
- Dopamine Jailbreak (Fugu15 Max) Release Is Coming Soon for iOS 15.0 – 15.4.1 A12+
- Cowabunga Lite For iOS 16.2 – 16.4 Released in Beta! Install Tweaks and Themes Without Jailbreak
- Fugu15 Max Jailbreak: All Confirmed Working Rootless Tweaks List
- iOS 14.0 – 16.1.2 – All MacDirtyCow Tools IPAs
- iOS Jailbreak Tools for All iOS Versions


